The Conceptual Design
The ‘Mi’ stool is a convertible, multi-functional chair tailored for a commercial or domestic environment. It is targeted to individuals ranging from the age of sixteen to thirty-five years. The modern and stylistic design resembles a ‘M’ shape; the first letter of the name of the stool. Evermore, the structural design is unique to other stools in materiality (using flexible cardboard), the way the base is smaller than the top and the impression the seats gives as its resting on interlocking cardboards that you cannot see.
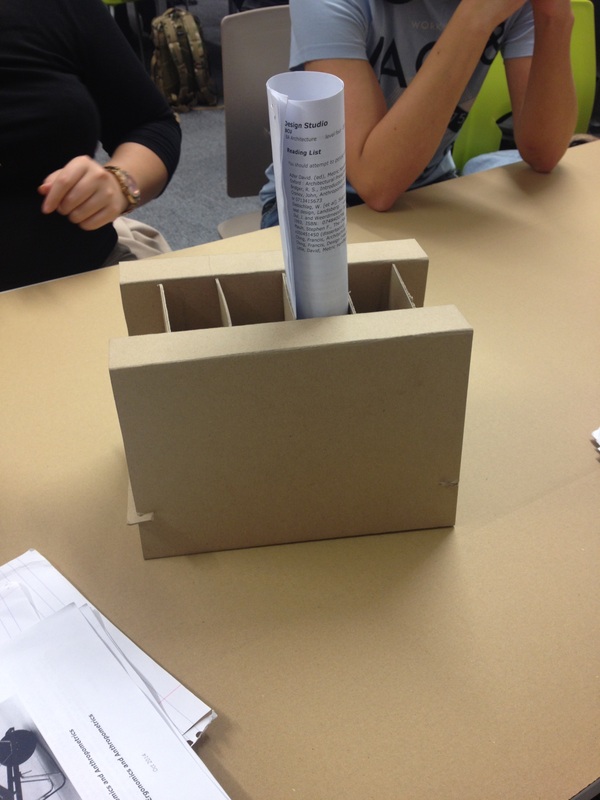
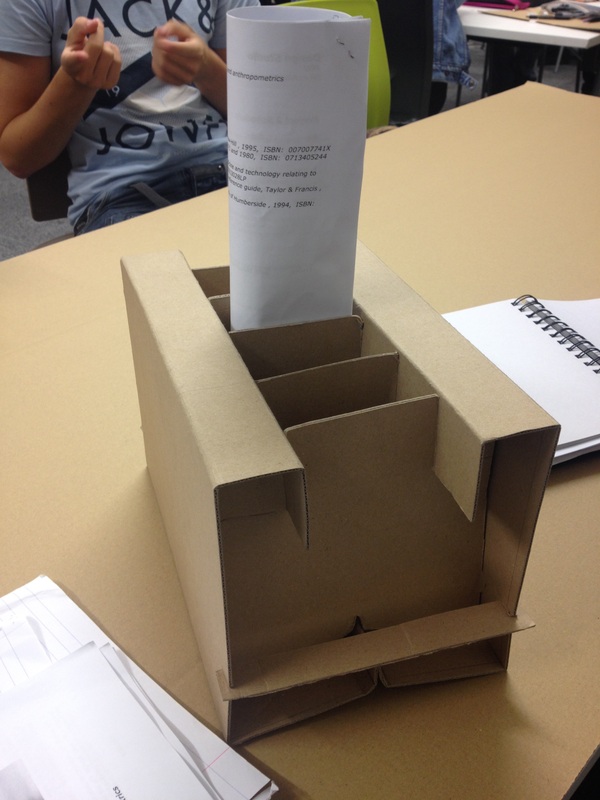
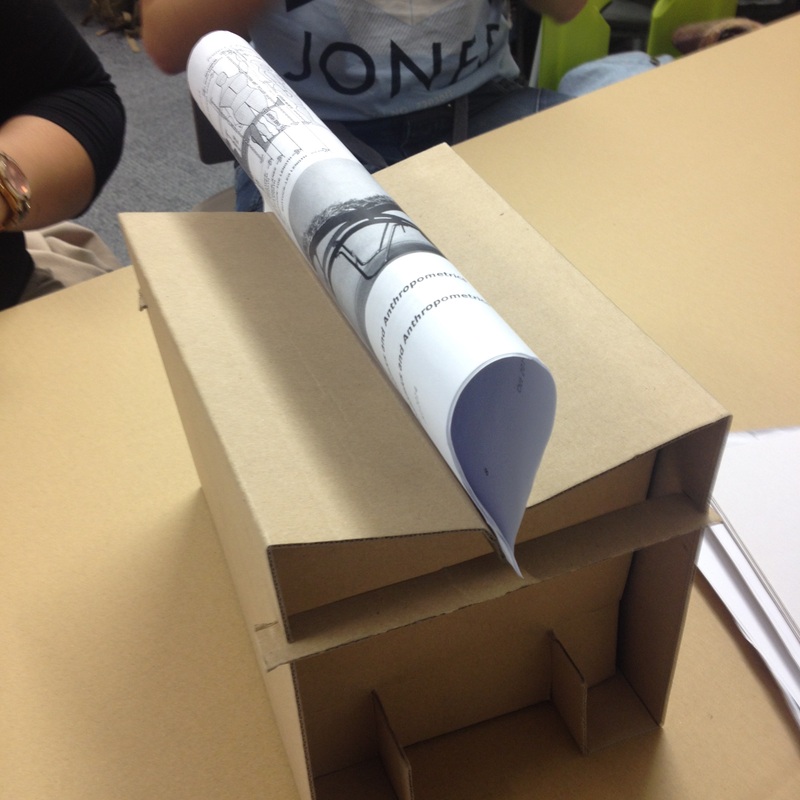
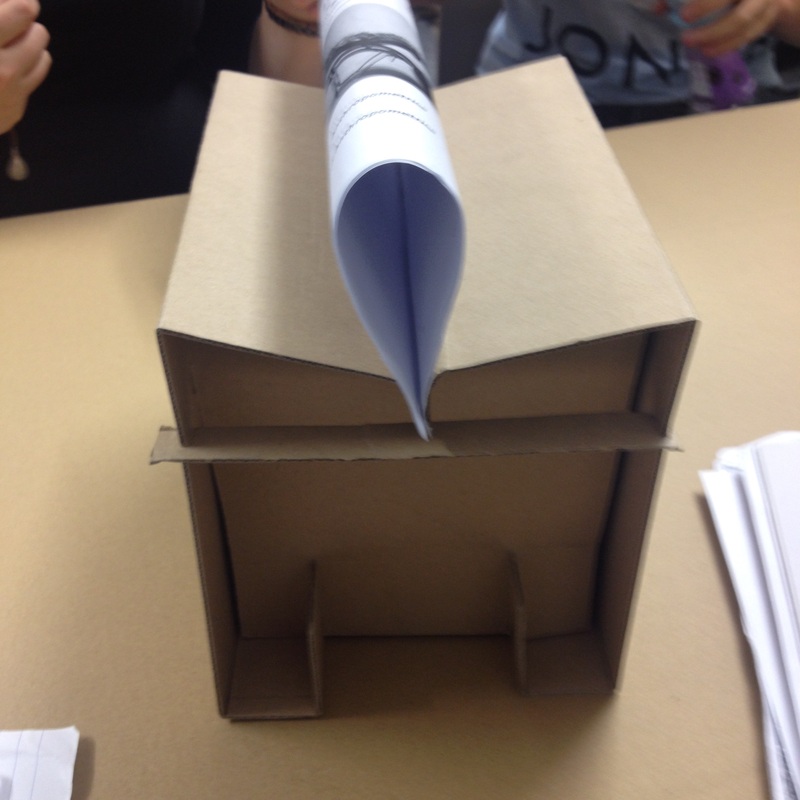
Moreover, the ‘Mi’ stool is not just an ordinary stool, but incorporates different uses such as: a side table; a step stool; a footrest when rotated on a 90 degree angle both ways from the top and when turned 180 degrees can be used as a holder for things like magazines and newspapers. In addition, the stools lightweight and simplistic properties make the stool easy to ensemble and resemble and therefore able to be transported from location to location.
The concept of the design originated from the idea of having a personal chair for personal use. The segment of the title ‘Mi’ was birthed from the use of the personal pronouns ‘My’ and ‘I’ , hence the creation of ‘Mi’ from the combined words. This was derived as a consequence of the psychological theory that humans tend to have self-interest.
The ‘Mi’ stool is a convertible, multi-functional chair tailored for a commercial or domestic environment. It is targeted to individuals ranging from the age of sixteen to thirty-five years. The modern and stylistic design resembles a ‘M’ shape; the first letter of the name of the stool. Evermore, the structural design is unique to other stools in materiality (using flexible cardboard), the way the base is smaller than the top and the impression the seats gives as its resting on interlocking cardboards that you cannot see.
Moreover, the ‘Mi’ stool is not just an ordinary stool, but incorporates different uses such as: a side table; a step stool; a footrest when rotated on a 90 degree angle both ways from the top and when turned 180 degrees can be used as a holder for things like magazines and newspapers. In addition, the stools lightweight and simplistic properties make the stool easy to ensemble and resemble and therefore able to be transported from location to location.
The concept of the design originated from the idea of having a personal chair for personal use. The segment of the title ‘Mi’ was birthed from the use of the personal pronouns ‘My’ and ‘I’ , hence the creation of ‘Mi’ from the combined words. This was derived as a consequence of the psychological theory that humans tend to have self-interest.
SKETCHES
|
|
|
|
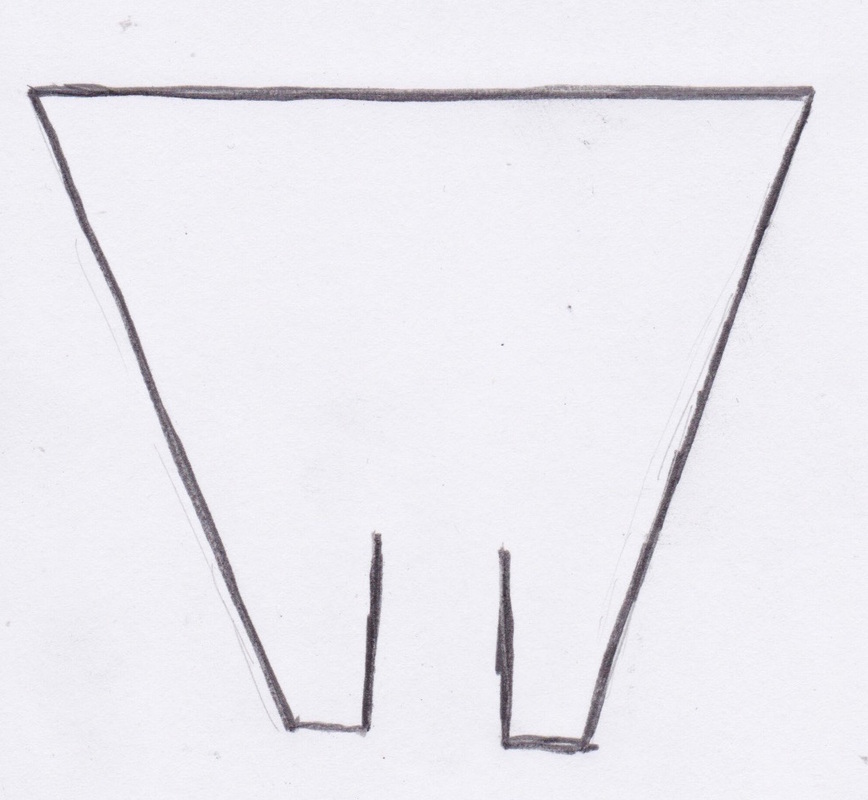
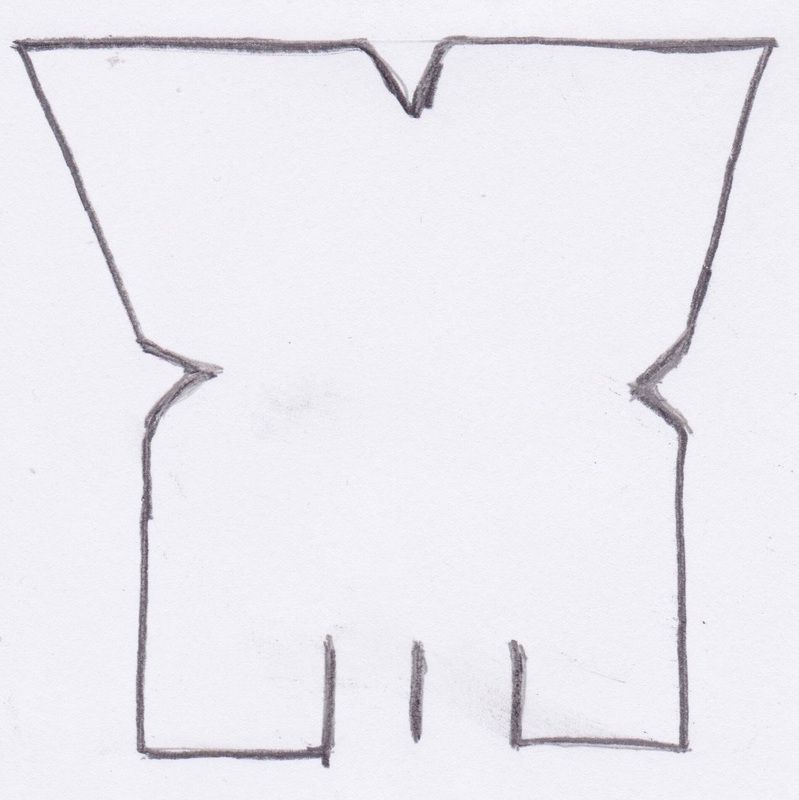
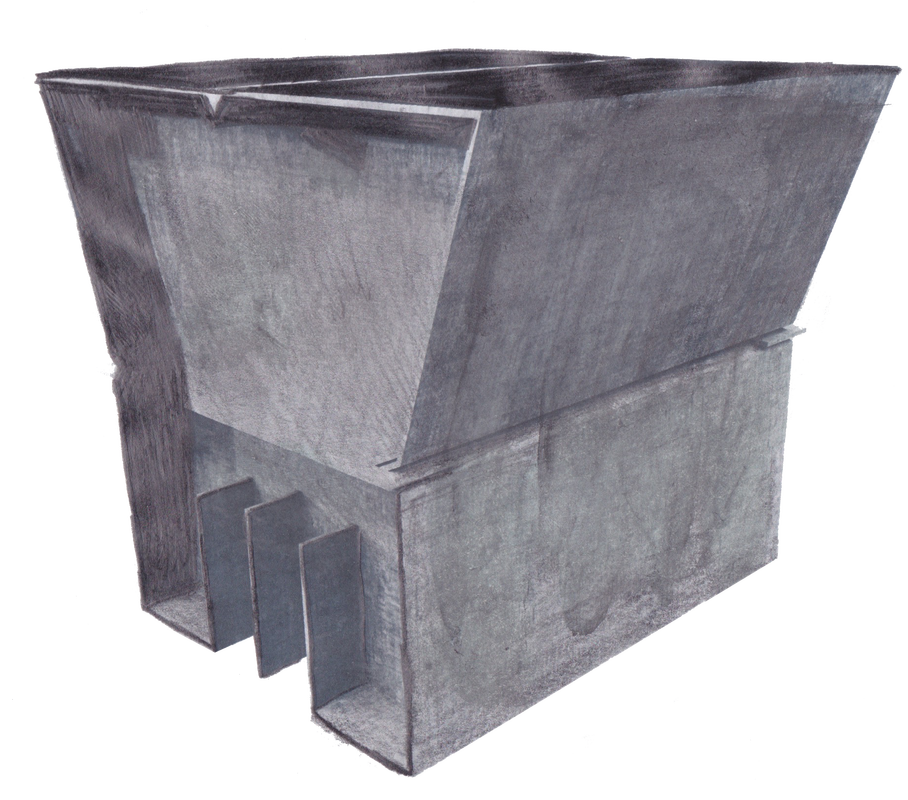
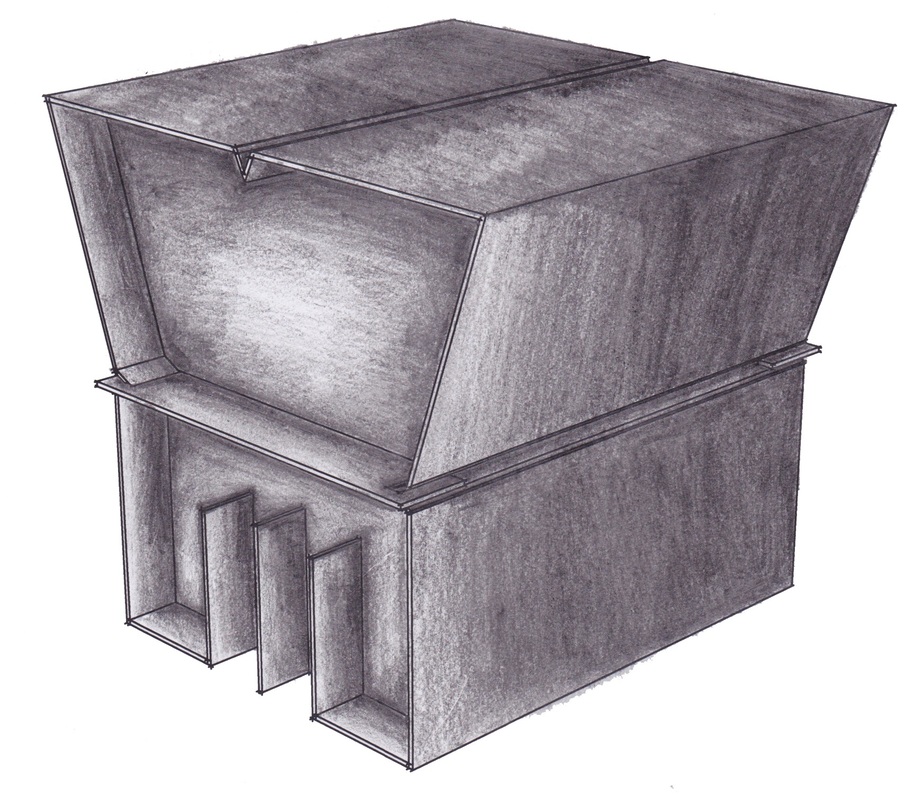
Using an outline of a CAD drawing, we have shaded some designs for the development process. using a variety of sketching pencils, this was to help us see what an idea of the chair could possible look like from a 3D Dimensional angle, To get the correct shades and brought the chair to life with subtle shading, however to improve this we would make the outer top elevation and the rear elevation a little less harsh in contrast to the rest of the chair.
Friday 31st -Tuesday 4th November 2014
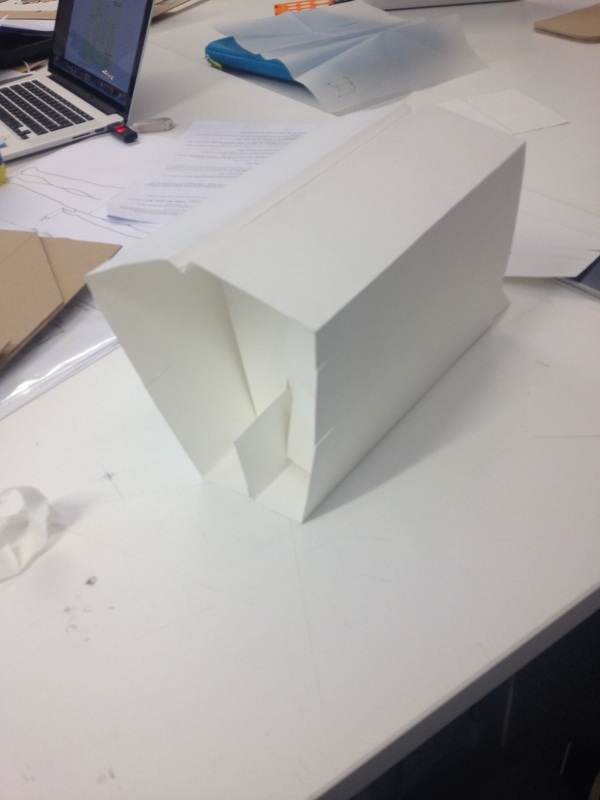
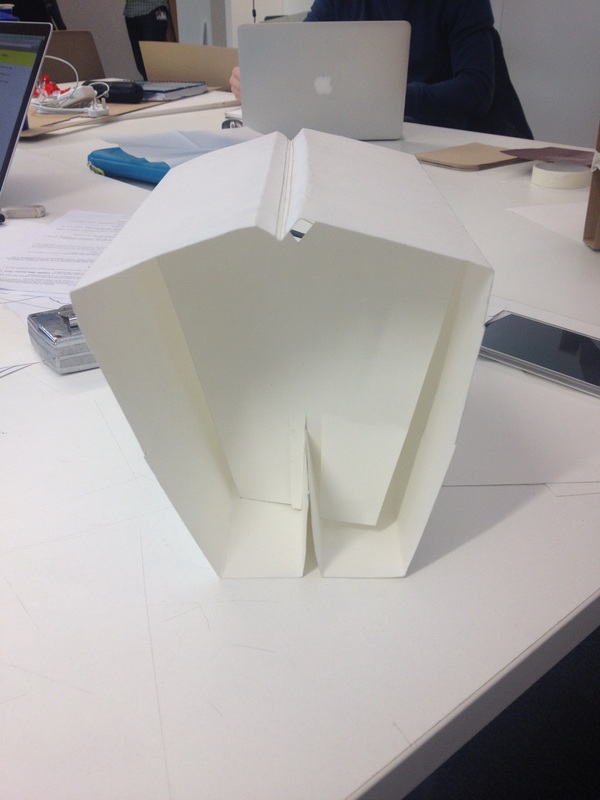
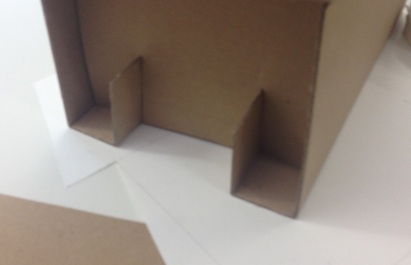
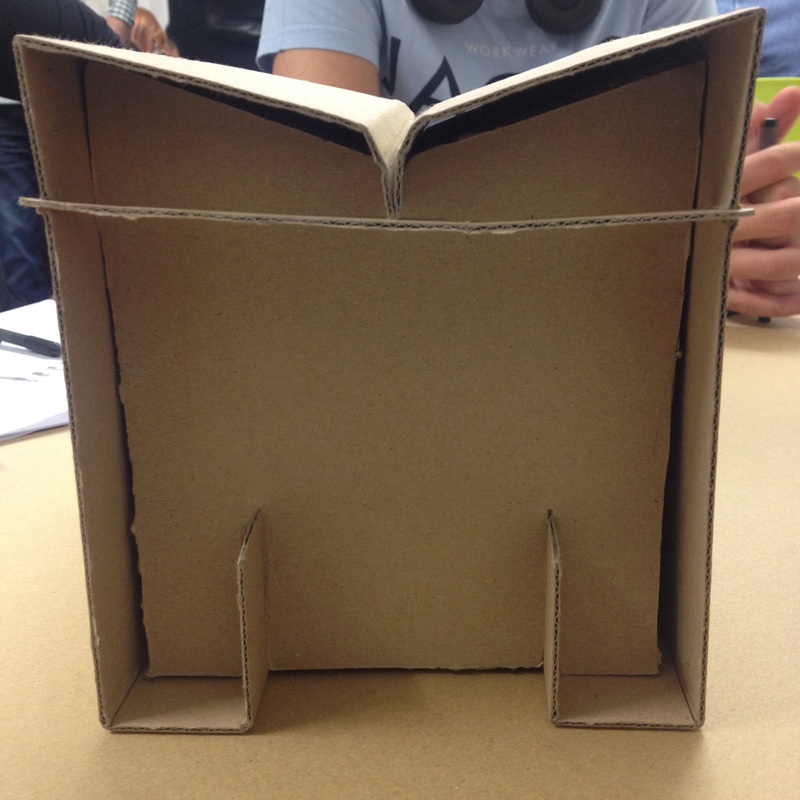
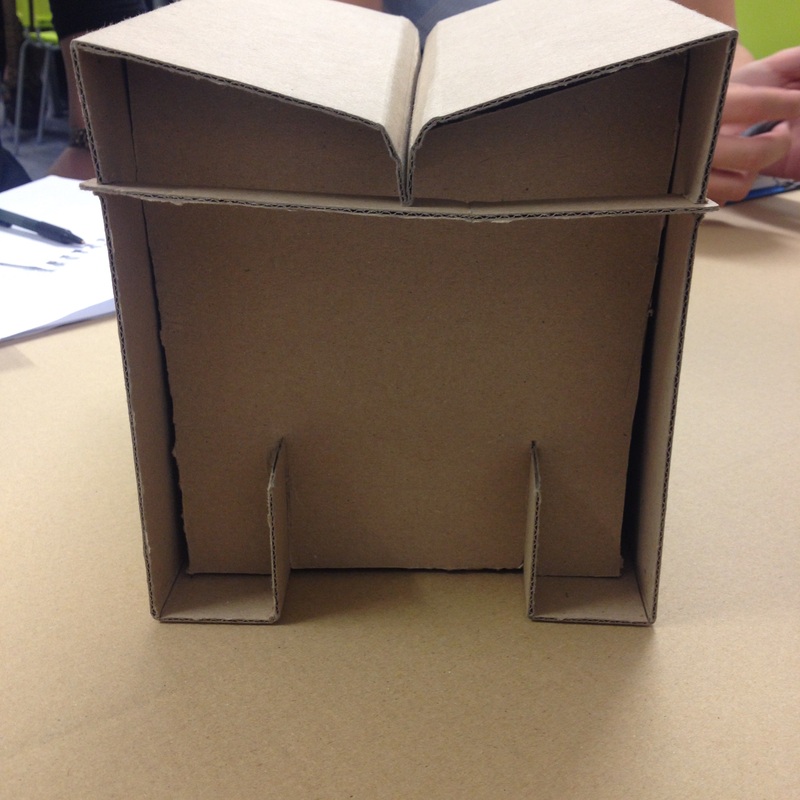
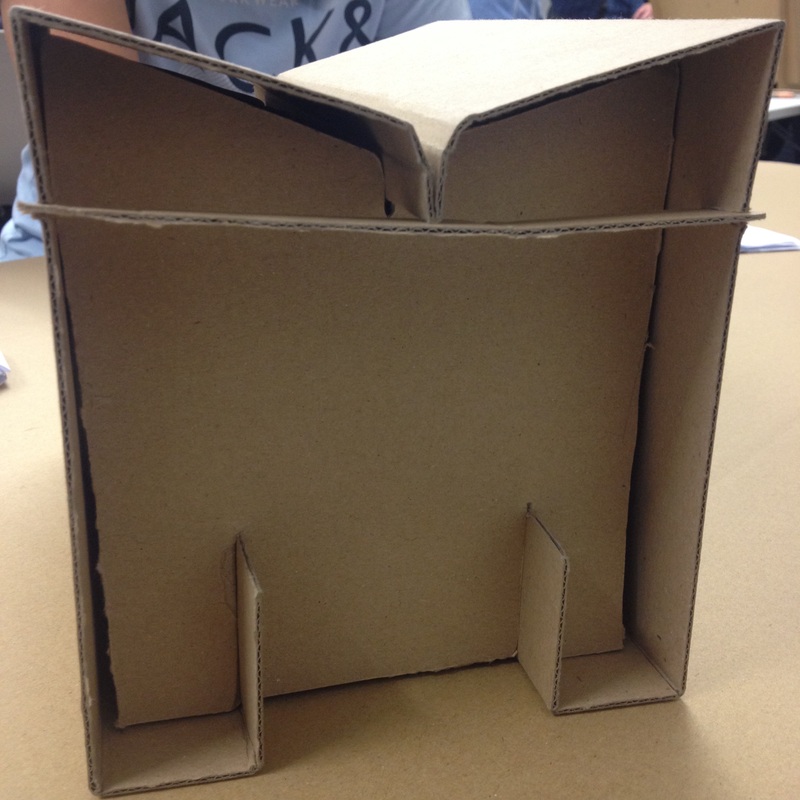
We built a design development model in cardboard provided at a scale of 1:2. This was to show our final idea to the tutors and peers, whilst it was also to review the initial design, the form, suitability for activity, ease of construction, number of parts, strength etc,. It was also for us to get an understanding of what the chair could be used for (as we wanted it to be multifunctional and versatile chair). As a consequence, this 1:2 model helped us to see our weaknesses (t make improvements from and strengths).
How We Linked Wood Joints To Our Cardboard Joints?
In woodworking, joinery is used to join wooden pieces together without the ordinary use of adhesives or binding etc. The wood joints should produce strength and also flexibility. Since our project requires us to use only card (with no adhesives) we had to research into the different types of wooden joinery’s thus allowing us to therefore re-create the same joints, but instead of wood using card. As card and wood have different properties, not all of the joints were applicable to card.
Reference of photo : http://en.wikipedia.org/wiki/Halved_joint
|
|
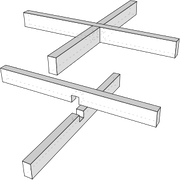
This is an illustration (above) of what is called a ‘halved joint’. It is where material is removed from each of the wooden pieces, which are to be joined together. This creates an intersection, where the pieces overlap each other. In our card joints, we often had to use this halving joint technique to intersect pieces together and to also to ensure that both pieces would be levelled.
|
reference of photo : http://en.wikipedia.org/wiki/Finger_joint
|
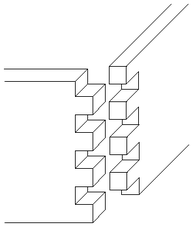
The ‘finger joint’ is a joint that combines two corners together in an interlocking method. Similarly, the card pieces were also used in the same way with multiple slits to interlock card together, to provide strength to the structure, especially since the chair had to be able to stand under human weight.
Both types of joints also gave us the idea to even use the slots to insert multiple card pieces into one slot.
Reference:: "Woodworking Joints." Wikipedia. Wikimedia Foundation, 27 Oct. 2014. Web. 31 Oct. 2014. <http://en.wikipedia.org/wiki/Woodworking_joints>.
Using Packaging as Inspiration
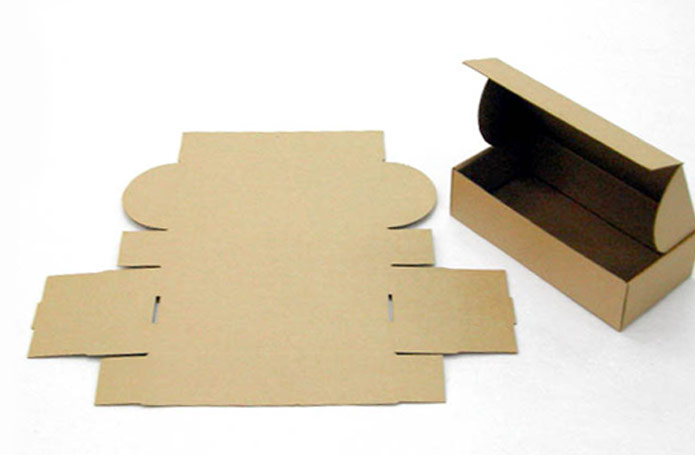
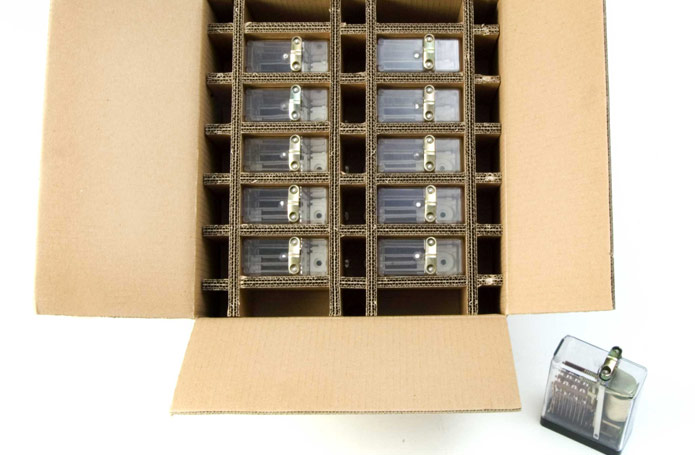
Looking at different types of card packaging also gave us ideas on how we could possibly combine card pieces using methods that already use card as a material. This was a great way to go, as packaging has properties that we also desire in our chairs, such as strength to carry weights, the ability to stay intact and its flexibility in its ability to be assembled and reassembled.
Here’s a few ideas we took note of:
Here’s a few ideas we took note of:
The idea of boxing to make a suitable sturdy structure and using slots to join a long piece together.
|
The use of building a grid out of intersecting pieces of card.
|
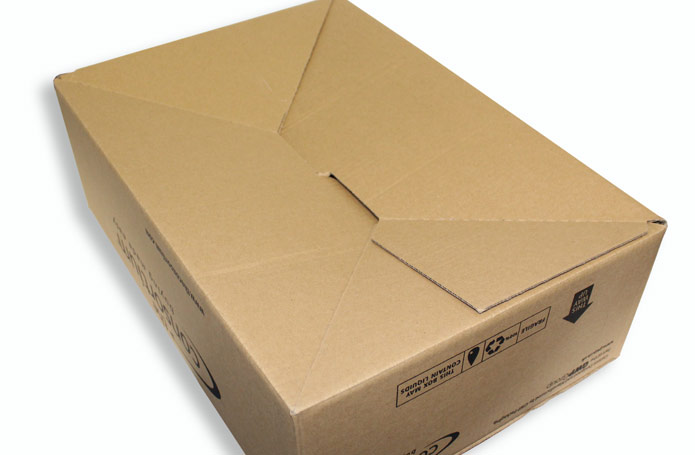
The interesting way that it can be dismantled to a flat pack way and then can be rebuilt easily. Also like the method of sliding cards together to piece the box together.
|
Reference : http://www.gwp.co.uk/packaging/packaging-products/
Structural Properties of Cardboard (Corrugated)
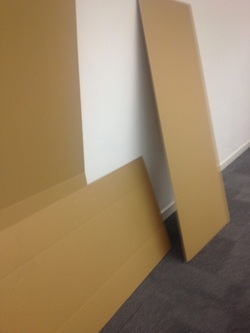
Here is a photograph of our A0 sheet of cardboard, this is to be used for a our final 1:1 model of the chair, looking into research about this certain crabbed thought as a group how strong it is and how hard or easy it will be working form this certain cardboard. so looking at corrugated cardboard we thought we need to know more about the material before we used it as there are many types if cardboard out on the market today.
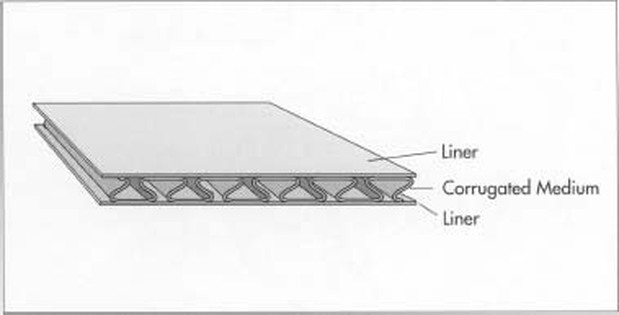
Corrugated Cardboard gains its strength from the medium that is present between the layers of flat card. These mediums that are consistent throughout the cardboard act in a similar way to a truss structure in a home. They have the weight and pressure forced upon them and distribute it evenly throughout the length of the cardboard so that there will be less chance of structural failure. This is very effective because the longer it takes for the cardboard to fail underweight and force the longer it shall be able to be used before it will need to be replaced. This therefore becomes beneficial both economically and environmentally as it means the user of the cardboard will not have to spend a lot of money in terms of replacement materials which in turn means that less areas will be deforested for the manufacture of the cardboard. Like any material though it will have it limits as to how much force can imposed upon it before reinforcement is needed. There are many factors that can have an effect on the total strength that cardboard will possess. These are:
· The thickness of the sheets that are used to line the cardboard and give it its appearance.
· The strength capabilities and thickness of the medium between the two lining layers.
· The amount of corrugations that are spread throughout the medium
When the cardboard is used in a way that the medium is vertical on its ends a more compressive strength can be achieved as it will be less prone to bending.
Once cardboard has been manufactured a section out of each batch will be subject to testing where it will obtain a ‘’box certificate’ which is used so that people are able to identify how much stress can be put onto the box at any one time. In this testing they will have to endure an edge crush test and a burst test.
The crush test is used to determine the cardboards ability to carry weight before crushing starts to occur along the edges. The burst test is used in the test to determine the amount of force that can be applied to certain amount at any one time before ruptures start to occur throughout.
Brianstuff/ howcardbaordworks-http://www.brainstuffshow.com/blog/how-cardboard-works/
EhowUk/propertiesofcorrugatedcardbaord/ehowuk-http://www.ehow.co.uk/list_6310456_properties-corrugated-cardboard.html
Friday 7th November 2014
1:2 PROTOTYPE
PROCESS OF WORK
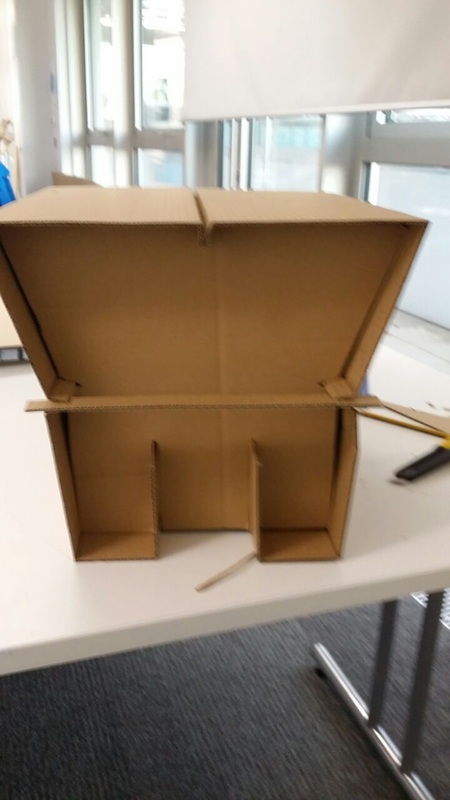
Step 4 - Review the initial design (form, suitability for activity, ease of construction, number of parts) and revise if necessary
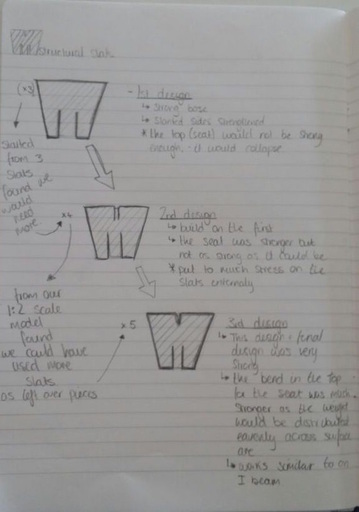
The initial design that was developed throughout our group had sprung from the idea of a multipurpose versatile chair. Because of this we decided to give it a unique form to where each section would have its own purpose. This initial design had managed to serve some of its intended purposes through its developed form but not all of them could be achieved meaning that it was not fully suitable. This is because in order for it to be used as a table as well as a footrest and seating arrangement the top elevation would have to flat so that objects are able to be placed at a steady 90o angle so that no damage would be caused to the user or their intended items that are to be placed upon the stool.. The stool we had created was very easy to assembly because of its simplistic and minimalistic design which benefits the goal of making this available for various applications and purposes. The initial stool developed had consisted of 6 parts / components that would have to be used in order for it to be assembled correctly. This is very beneficial as it means that it won’t take a lot of time to erect and put into its desired position. However because it had little number of parts there was not enough density and strength within the structure of the stool to withstand the weight of a fully grown human adult meaning that further development would be needed.
The initial design that was developed throughout our group had sprung from the idea of a multipurpose versatile chair. Because of this we decided to give it a unique form to where each section would have its own purpose. This initial design had managed to serve some of its intended purposes through its developed form but not all of them could be achieved meaning that it was not fully suitable. This is because in order for it to be used as a table as well as a footrest and seating arrangement the top elevation would have to flat so that objects are able to be placed at a steady 90o angle so that no damage would be caused to the user or their intended items that are to be placed upon the stool.. The stool we had created was very easy to assembly because of its simplistic and minimalistic design which benefits the goal of making this available for various applications and purposes. The initial stool developed had consisted of 6 parts / components that would have to be used in order for it to be assembled correctly. This is very beneficial as it means that it won’t take a lot of time to erect and put into its desired position. However because it had little number of parts there was not enough density and strength within the structure of the stool to withstand the weight of a fully grown human adult meaning that further development would be needed.
Assembling another groups chair
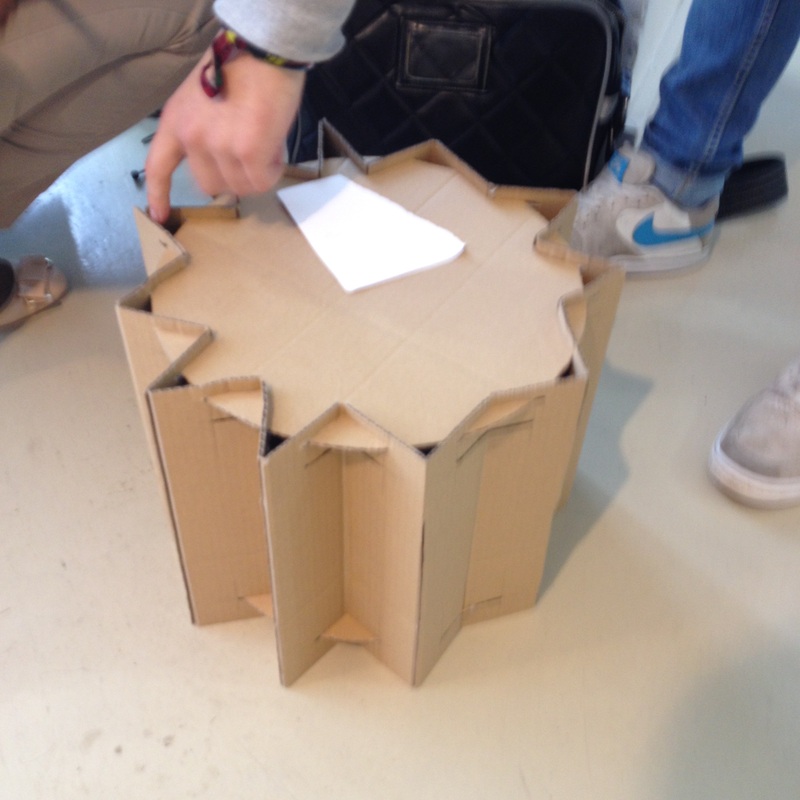
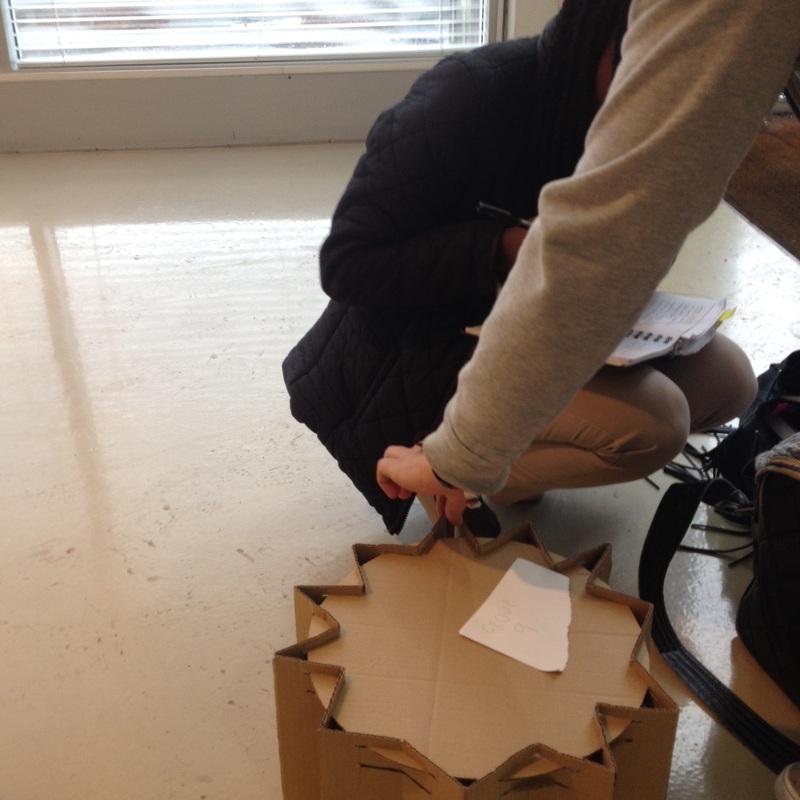
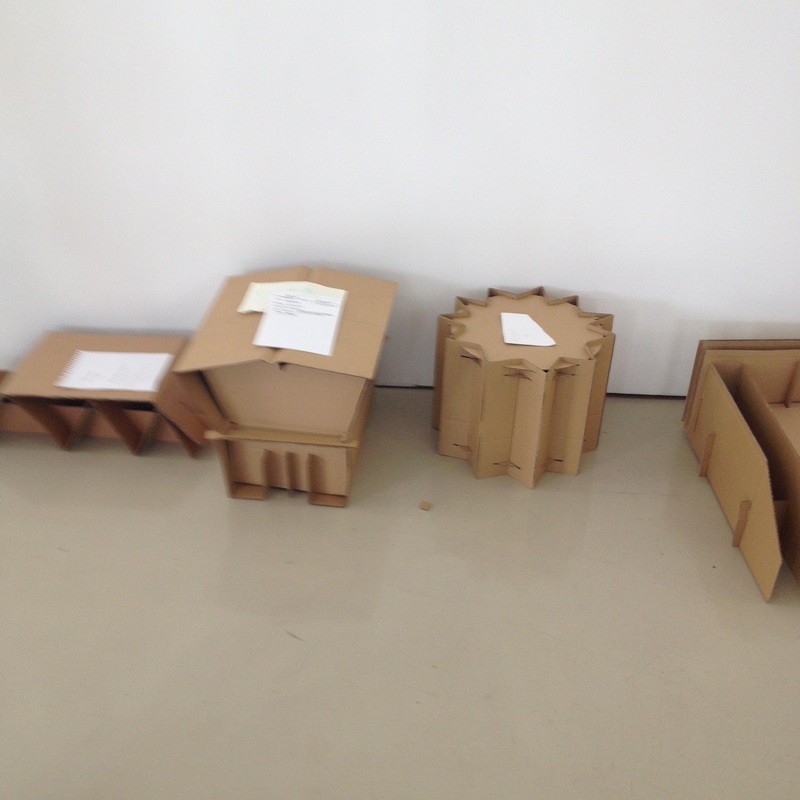
In this review day we all had to pick a group to assemble their 1:1 prototype chair together, without using an instructor manual. It was all about thoroughly testing the model so that it would tick all the boxes of the brief, leaving us with another week to make the essential changes that would be need to be implemented to make a perfect, or almost perfect chair.
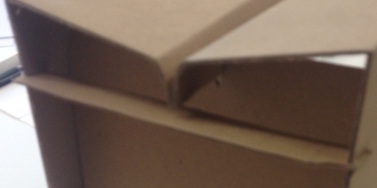
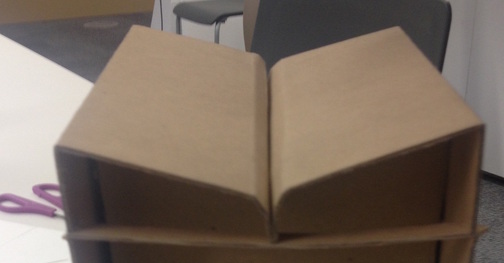
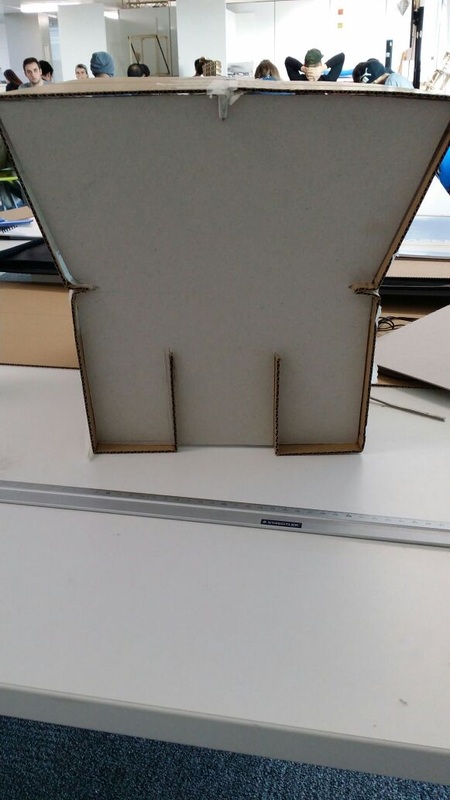
What we liked about this chair (see the pictures below) was the ease of assembling it, using as few as 5 pieces and taking even less than a minute to put together. We also thought that they had an interesting and unique design that stood out from the chairs presented amongst the groups in the class, especially with the pointed edge, which made it an attractive feature. In addition, we really liked the way they put their slots and joints together with 3 different circular bases.
What we liked about this chair (see the pictures below) was the ease of assembling it, using as few as 5 pieces and taking even less than a minute to put together. We also thought that they had an interesting and unique design that stood out from the chairs presented amongst the groups in the class, especially with the pointed edge, which made it an attractive feature. In addition, we really liked the way they put their slots and joints together with 3 different circular bases.
|
|
|
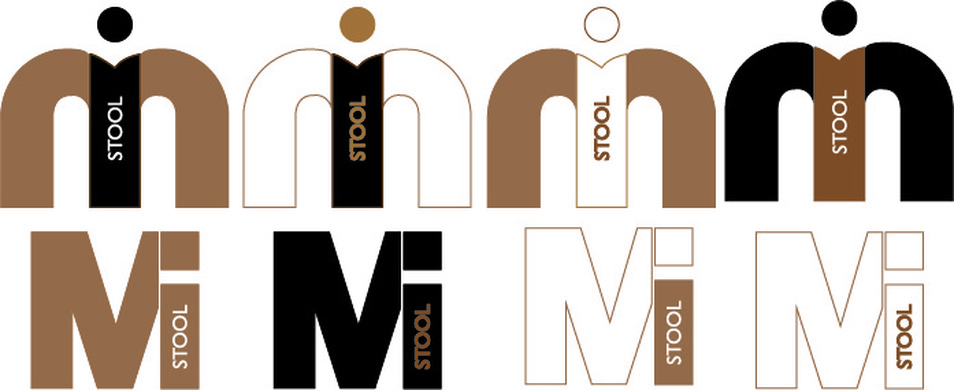
Logo ideas
For part of our A1 panel we wanted to add a logo onto it, looking at logo ideas we started to manipulate the letters 'm and I' these were the w letters which were form he name of the stool "MI", also looking at our chair its quiet squared and round so we then went onto looking how our logo could possible be a rounded shape or some sort of a rectangle shape.
Our ideas for the logo's are shown below we have only done 2 because we thought these were the strongest ones out of the others so we have tested them in colour to show variations, using the colour brown to juxtapose cardboard colour.
Our ideas for the logo's are shown below we have only done 2 because we thought these were the strongest ones out of the others so we have tested them in colour to show variations, using the colour brown to juxtapose cardboard colour.